Edit Front Matter
A lot of people, like me, are trying to get jobs outside their own country so to be able to do that we need to learn and master our mother language and, in my case, English. With that said we need to do all our articles, resume, I mean everything in two languages, so today I'll be teaching you guys how to manage to get two or more languages using React/Next.js. ## Introduction First and formals we'll need to setup our next project: ```javascript npx create-next-app # or yarn create next-app ``` After that we need to install the dependencies that we'll need for this project `next-i18next`: ```javascript yarn add next-i18next # or npm install --save next-i18next ``` ## Configuration With all that managed, we need to move forward in config our files. So with that been said, let's move in to that: - At first, we need to create a next-i18config file, that we're going to name by `next-i18next.config.js`, inside it we'll put our locale configuration, based on our locales, in my case: ```javascript module.exports = { i18n: { defaultLocale: 'en', locales: ['en', 'pt-BR'], }, } ``` - Now we'll create a file named `next.config.js` or open the existing one and added our i18n file to be exported as well. ```javascript const { i18n } = require('./next-i18next.config') module.exports = { {...} i18n, } ``` - Now we need to create a `locales` folder in our public folder and inside it create our different languages folder with a `common.json` file each: 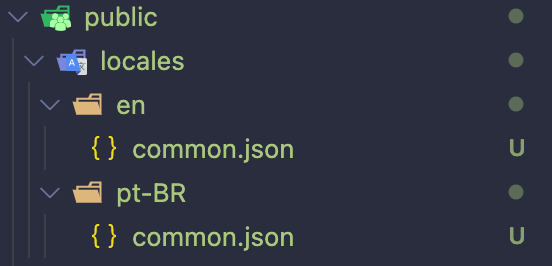 **PS**: It's important and will not work without the `common.json` file. - Last but not least, we'll connect the i18n with our app, open the `pages/_app.js` directory and do the following: ```javascript import '../styles/globals.css' import { appWithTranslation } from 'next-i18next' function MyApp({ Component, pageProps }) { return <Component {...pageProps} /> } export default appWithTranslation(MyApp) ``` Voilá, now we can start to using our different locales into our app. ## Implementing different languages Next we'll implement the different languages visually: - Here we need to define some text for example to change per locale, so in each `locale/{...}/common.json` folder we'll create a property name ``title``: ```javascript // locale/en/common.json { "title": "Building a multi language website with Next.js" } ``` ```javascript // locale/pt-BR/common.json { "title": "Construindo um website com suporte a multi linguagem, utilizando Next.js" } ``` - Now, to use this information in our page we need to getStaticProps in use, we'll need to import `serverSideTranslations` from next-i18next: ```javascript import { serverSideTranslations } from 'next-i18next/serverSideTranslations' export const getStaticProps = async ({ locale }) => { return { props: { {...}, ...(await serverSideTranslations(locale, ['common'])), } } } ``` **PS**: At this point, you'll need to add the `common.json` in this array always, even if you need to use other json file, for example: ```javascript export const getStaticProps = async ({ locale }) => { return { props: { {...}, ...(await serverSideTranslations(locale, ['common', 'example'])) } } } ``` - Now the nicest part, adding our translation in to the visual code. First we need to import `useTranslations` from react-i18next (react-i18next will be installed with create-next-app don't worry), then, we'll disrupt the useTranslation to get the property `t`, that will directly used for our translations: ```javascript import { useTranslation } from 'react-i18next' export default function Home() { const { t } = useTranslation('common') return ( <div className={styles.container}> {...} <main className={styles.main}> <h1 className={styles.title}> {t('title')} </h1> </main> {...} </div> ) } {...} ``` **PS**: The main difference between the getStaticProps using and the useTranslation is that, in the getStaticProps we need to always include common.json in the array, but in the useTranslation we'll add only the file that we need. In your `common.json` and `example.json` example, we would have: ```javascript import { useTranslation } from 'react-i18next' export default function Home() { const { t } = useTranslation('example') return ( <div className={styles.container}> {...} <main className={styles.main}> <h1 className={styles.title}> {t('title')} </h1> </main> {...} </div> ) } export const getStaticProps = async ({ locale }) => { return { props: { {...}, ...(await serverSideTranslations(locale, ['common', 'example'])), } } } ``` ## Result ```bash http://localhost:3000/en ```  ```bash http://localhost:3000/pt-BR ```  ## PLUS If you're wonder on how to change the language by pressing a button, I'll solve your question right now. To be able to change the locale onPress a button for example, we need to import Link from next/link. Link have a property named ``locale`` that could be use for change our language, so you can create how many locales do you want and do like the following: ```javascript {...} import Link from 'next/link' {...} export default function Home() { {...} return ( {...} <main className={styles.main}> {...} <div className={styles.container}> <div className={styles.locale}> <Link href={'/'} locale={'en'}> <p>EN</p> </Link> </div> <div className={styles.locale}> <Link href={'/'} locale={'pt-BR'}> <p>PT-BR</p> </Link> </div> </div> </main> {...} </div> ) } export const getStaticProps = async ({ locale }) => ({ props: { ...(await serverSideTranslations(locale, ['common'])), }, }); ``` And we're ready to go !!! Check the github repository for this article right here: [GitHub Repository](https://github.com/brunofrigeri/multi-language-nextjs)